Several years ago, the smart dining chairs I’d been given for my 21st birthday began to fall apart, and I started to restore them. The chair bodies were mostly deconstructed, sanded and glued back together again—slow, careful work, but very relaxing. I used PU wood glue which is wonderful stuff. After final sanding, the wood was wiped down with white spirit and three coats of polyurethane varnish. When it came to restoring the ripped and ruined seats though, I was less confident how to proceed. Luckily, a friend had been on a furniture restoration course, and she remembered enough about the process to get me started.
Tools
Magnetised Tack Hammer
Curved upholstery needle
Heavy duty scissors
Materials
Hessian (cloth)
Calico (cloth)
Plasticised cloth or leatherette, etc. (outer covering)
13mm tacks (used for what? Webbing?)
10mm tacks (used for hessian, calico and outer covering)
Gimp pins (used for fine work on outer covering)
Number 2 upholstery twine (thickish twine)
Instructions
These instructions explain how to upholster a solid-based chair seat using traditional materials. There are other ways to do this job using more modern materials; typically foam padding is used and cut to shape using specialist equipment. I wanted a more traditional approach which I felt would better match the dining chairs I have restored.
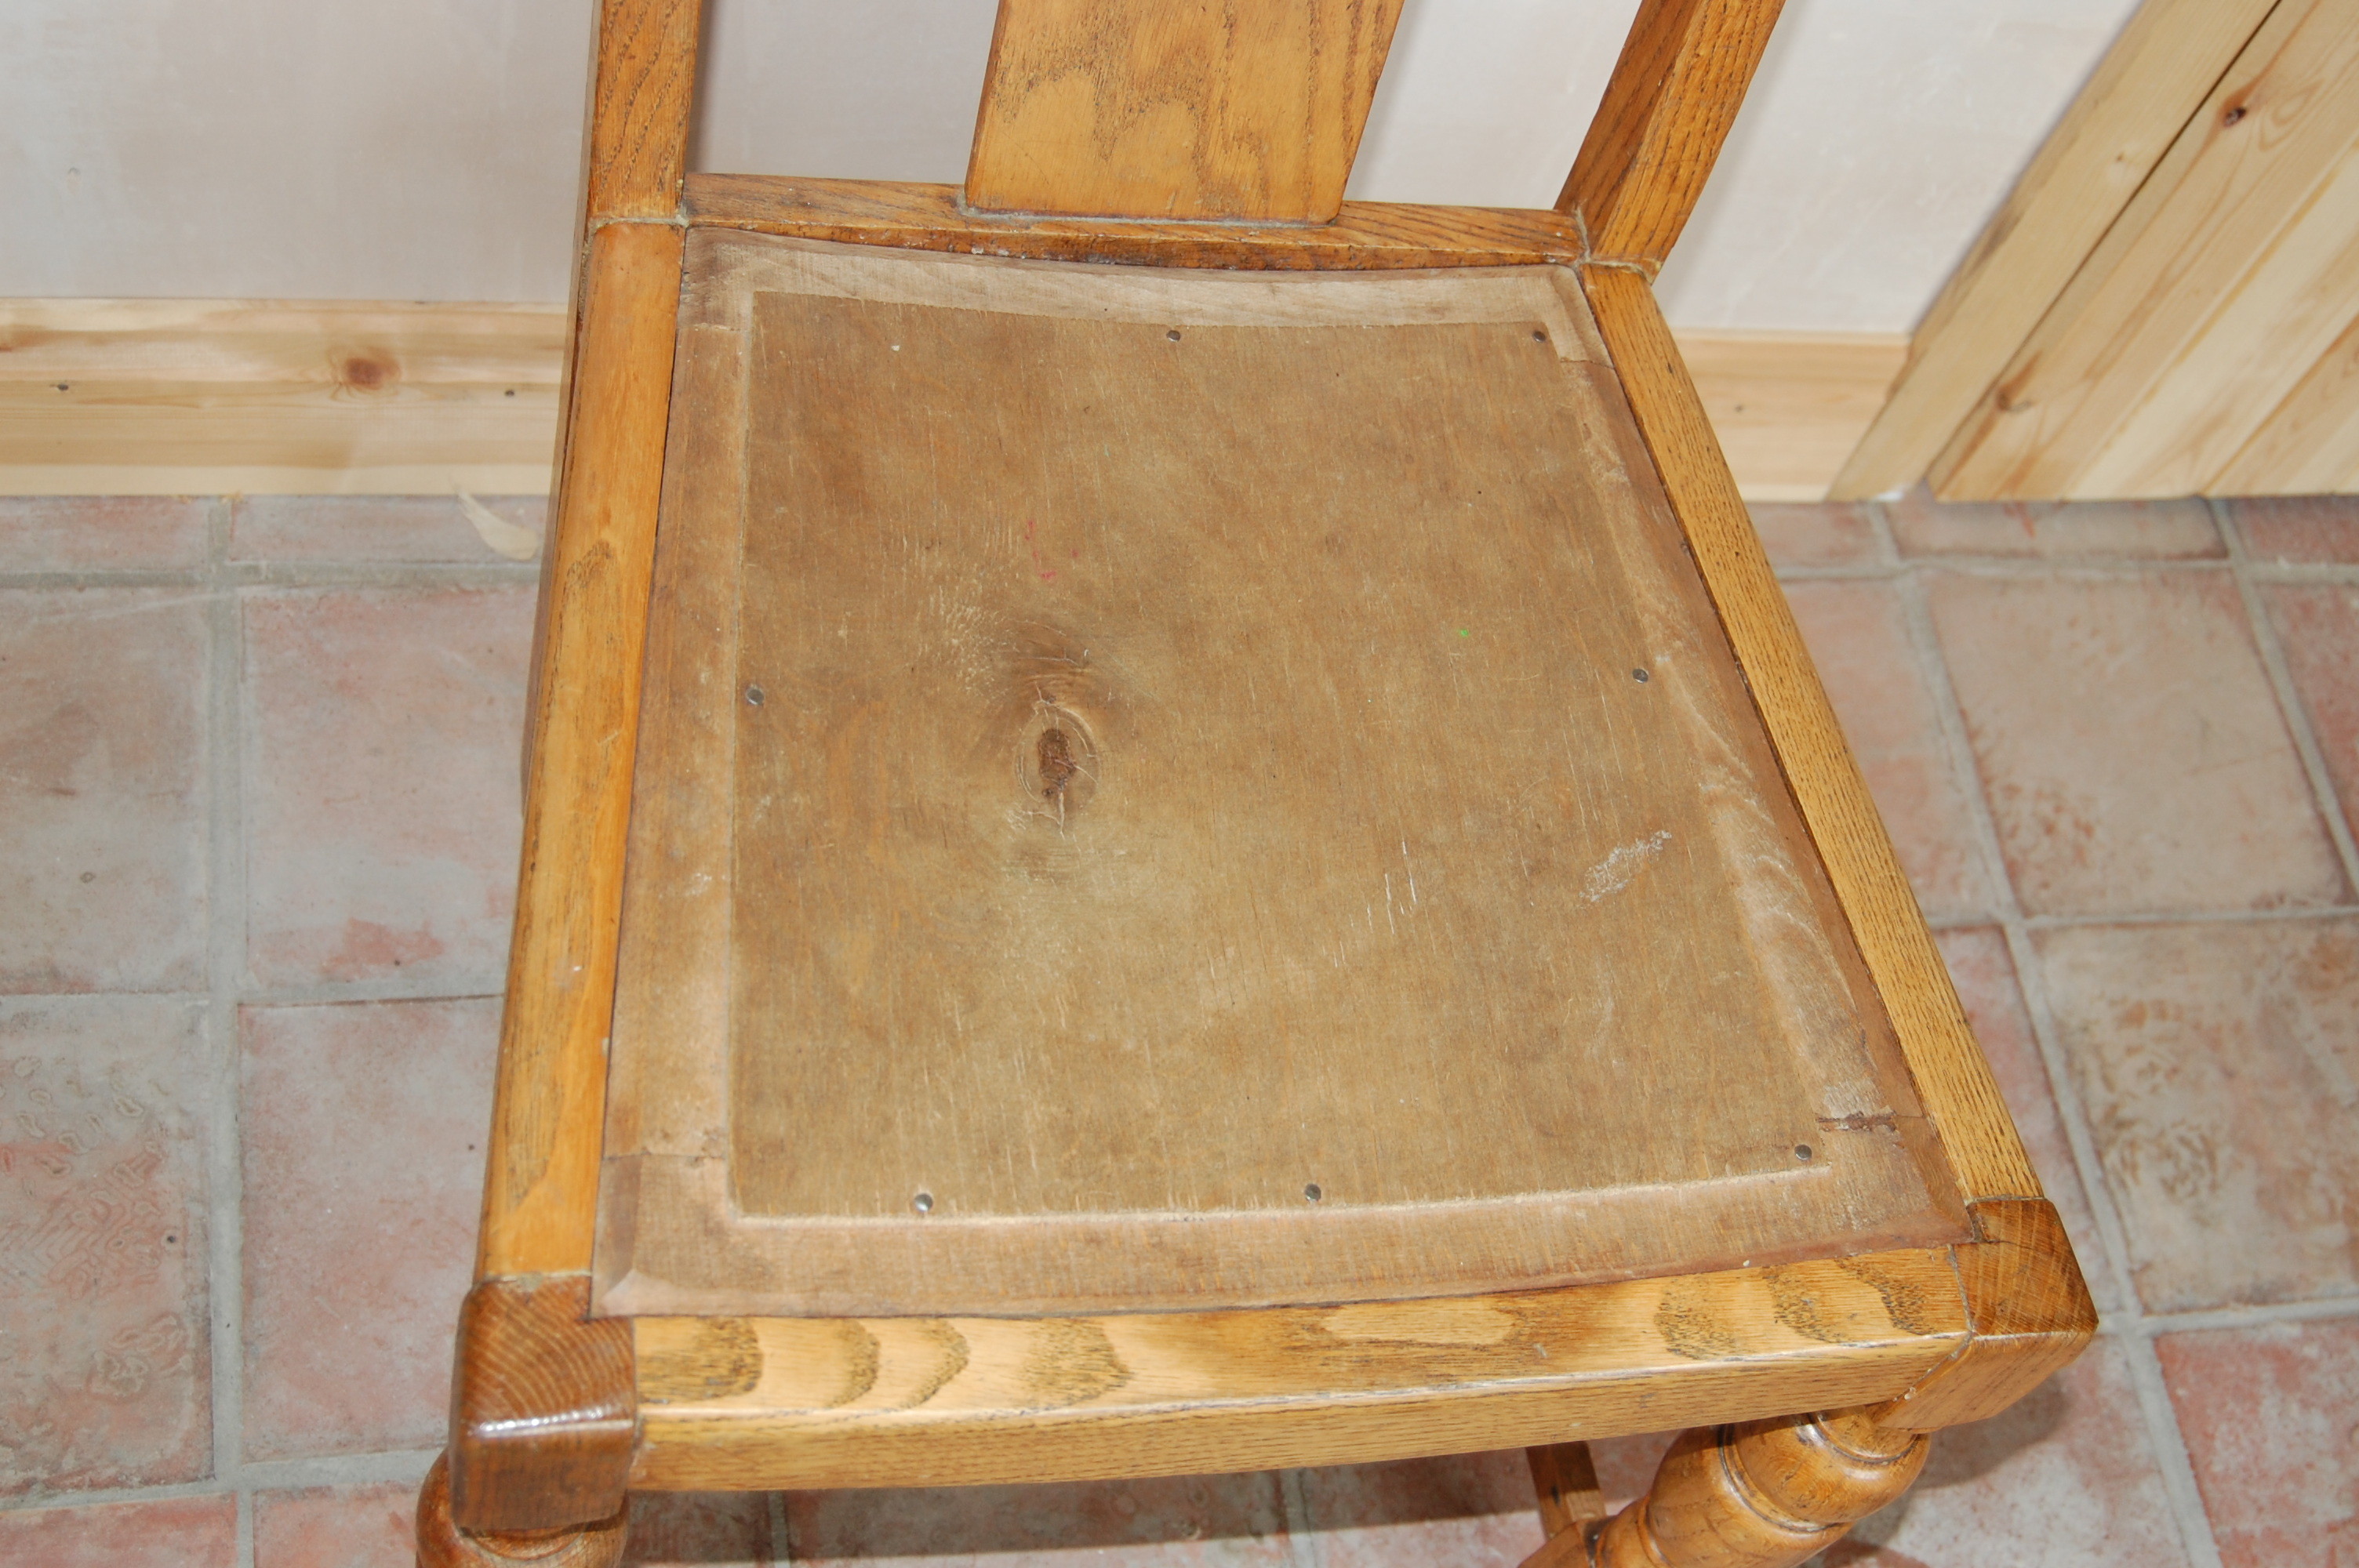
The chair with the solid wooden seat-base fitted
I have assumed that the chair seat has a solid base, as mine had. If instead the seat has an empty, rectangular frame, then webbing must be mounted on the frame first. I have not done this myself. Once the webbing is in place, these instructions can be adopted as though the seat had a solid wooden cover.

Underside of the solid base
Hessian layer
Place the seat frame upside down on top of a sheet of hessian, and fold the hessian around the frame. The hessian should be cut large enough to allow it to fold around the bottom of the frame as shown in the photo. Cutting hessian is not easy. Where possible, try to cut true to the “grain” of the hessian. One might mark the cutting line with a fat permanent marker, or one can remove a single thread of the hessian to create a straight line to cut along. Choosing the right size for the hessian is important. As shown in the photo below, the idea is to have enough material to cover the top and extend around the sides of the seat, finishing quite close to the edge on the bottom of the seat. The material is folded under itself before being tacked, as you can see at the corners in the photo below. The reason for tacking the hessian close to the edge of the seat base is to allow room further from the edge for the additional nails which will hold down the subsequent coverings.
With the seat frame sitting face down on top of the cut hessian sheet, place one of a pair of parallel frame edges towards you. Fold the nearest edge of the hessian up onto the back of the frame, tuck the edge under and tack in the centre of the side using a 10mm tack. Do the same at the opposite edge, stretching the hessian taut. Then do the same again on the other two edges, placing one tack in the centre of each edge.

Tacking the hessian layer to the solid base
Then, add tacks to the left and right of the initial tacks, spaced about 0.5in to 0.75in (15mm, say) apart. Add two tacks on the side nearest to you, two on the opposite side, then two on the left side and two on the right, tightening the hessian as you go. Then work towards the corners, adding two tacks per side at a time. Tidy the corners as best you can without allowing multiple layers to overlap as this would impede fitting the seat back onto the chair.

Finishing a corner of the hessian layer
Twine spiral
The cushioning of the seat is provided by soft padding called coir, which is made from coconut husks. This padding needs to be held in place so that it doesn’t bunch up or migrate, and loops of twine are used to achieve this. As shown in the second photo below, I used a “square spiral” layout for the twine. Attach the end of the twine to the hessian using a knot close to the one edge and half a hand-width from one corner. Using a curved upholstery kneedle, make a stitch into the hessian one hand-width away from the starting point, parallel to the edge. The size of the loop is governed by the width and height of the four fingers around which you thread the twine, as shown in the photo below. I found this was a good size to allow a suitable amount of coir to be packed beneath it.

Each loop should be about a hand-width wide
When forming each loop, take care not to tighten the previous loop—each loop has to have room under it to pack the padding material in the next step. Continue forming loops in a line parallel with the edge of the seat, finishing the last one half a hand-width from the opposite edge. Then, turn parallel with that edge and continue stitching loops until the same distance short of the next edge. Continue in this fashion following a kind-of spiral pattern until the entire surface of the hessian layer is spanned by loops.

The complete twine spiral will allow even distribution of the padding
Pack surface with coir
Pull a bunch of coir from your stock and feed it under the first loop. Select the quantity of coir for each bunch such that the bunches just overlap each other. Be careful when packing the coir in, not to pull twine from the next loop! Don’t let the coir spill over the edge of the seat.

Pack bunches of coir under the twine, extending to the edge of the seat
The bunches away from the edge of the seat can be a little larger than those at the edge, to provide a slightly deeper cushion in the centre of the seat. The corner bunches need to be a little longer than the rest, as they have to gather right around the corner stitches, covering more area.

The seat showing all the coir packed under the twine loops
Cover with calico
Place the padded seat cover upside-down on a sheet of calico, and fold the material up around the bottom of the seat cover so that it reaches several inches in from the edge of the seat, and cut it off. Don’t cut the material at all close to the edge, because one needs a good length of material to pull on, during this step.

The calico is stretched across the coir padding and tacked inwards of the hessian
Calico is fairly thin material and overlaps can be tolerated on the bottom face of the seat, but not at the corners. Using a similar technique to that used when attaching the hessian, tack once at the center of each side, stretching the material to compress the coir padding before knocking in the second and subsequent tacks. Place the tacks just inwards of the folded hessian beneath. Once the first tacks are in place on each side, stretch the material as tight as possible before putting in the next tacks—the firmness of the resulting cushion will be determined by how tightly the calico is stretched, so this is important.

Avoid overlaps at the outer edge on the corners of the seat

The calico-covered cushion, from above
Add skin felt mat (optional)
Some cushions are further padded with “skin wadding,” which is applied on top of the calico layer. I did not use this on my seat cover, for fear of fattening the base sideways so much that it would not fit into the chair. It might be particularly appropriate if the final covering is a bit thin—coir is quite wiry and could potentially penetrate a thin covering.
Planning the folds for the final covering layer
Planning the folds at the corners was the most challenging aspect of this project. I made a mock-up of the corner folds using a piece of paper, and I recommend this method before starting to cut your real covering material.
The next five photographs illustrate the folding method I devised.

Place the seat cushion on a rectangle of paper

Fold one edge up

Fold the paper around the corner as shown

Fold the top back and down
The first diagonal fold (above) creates three layers of material. By careful cutting, the two lower layers can be removed to avoid extra thickness.

Fold the material up against the second side and fold onto the bottom of the seat as shown
The second diagonal fold (above) also creates three layers of material. The underlying two layers can again be trimmed out.

The same folds with the real covering material
Above you can see a trial folding using the real covering material. This demonstrates the extra thickness and the need to trim away the inner layers.
Applying the final covering
I chose a leatherette-style covering, perhaps a little over half a millimeter thick and backed with a fine mesh. It’s important not to choose too thick a material as some overlap at the corners is unavoidable, and the extra thickness was a potentially serious issue for me.

Initial tacking of the final covering material
Applying the final covering material starts in the same way as the previous layers did: one tack in the centre of each side, stretching the material strongly before hammering in the tacks. However, before progressing too far outward with the tacks on each side, the corners must be folded and trimmed, following the plan devised above.

It’s much harder to manipulate the covering material than it was the paper
First (below), fold the material from the right hand side around the corner, against the front face:

Fold across the front
Next (below), fold the excess above the corner back and downwards:

Fold back and down
Next, fold the material from the front upwards and back over the front edge:

The second diagonal fold
The result is too bulky.

Crease and reopen the folds
More to come!